How to optimise images for SEO – best practices
When people refer to website content, they often mean written copy. However, content can be anything on the page — copy, images, video, and more. A page without content is simply a blank page.
More often than not, you will find an array of people discussing content optimisation and keyword usage within articles and landing pages. But image search is becoming increasingly prevalent, so image optimisation should not be overlooked.
In the same vein, it’s not just the copy that needs to be optimised for search engine scrutiny — everything needs to be carefully considered, including images.
Here are some ways to follow best practices for image optimisation across your site to stand a better chance of ranking in image searches.
Choose legal images
This isn’t an SEO tip but rather a gentle reminder to only publish images you own, royalty-free images, or by using a stock image service such as Getty, Shutterstock, or Bigstock to avoid infringing copyright laws.
Not doing so can result in huge fines further down the line.
Although many companies use stock images, there is some benefit to using original, high-quality images, especially if you happen to be a powerful brand.

Choose a file type
The type of file you use is also important, as there are best practice guidelines for each kind.
JPEG
Most sites use JPEG images, which are great for maintaining a quality image once it is compressed or resized without compromising quality.
The only issue with JPEGs is they use lossy data compression, which means quality can be lost if an image is compressed and decompressed several times.
PNG
Thought of as a modern alternative to JPEG formats, the image type offers better transparency and colour range.
They can be saved as a PNG-8 or a PNG-24, with the former being limited to 256 colours, while the latter produces a much higher quality image at the cost of a larger file size — potentially affecting loading times.
GIF
It’s quite rare a brand will use a GIF file format in a page or blog in case the format slows page loading speeds.
You can, however, compress GIFs using lossy or lossless compression to ensure the file remains small.
Although GIFs are widely used on bookmarking sites and social media, brand guidelines limit their use across websites.
WebP
While JPEGs and PNGs were historically the optimal formats for your site’s photos, WebP is now favoured for speed performance thanks to its lossless and lossy compression. Developed by Google, WebP images can be compressed to a far smaller file size than the alternatives while still maintaining quality — so always use this format if possible.
If not, JPEGs and PNGs are your next best options, but always compress — there’s more on that below.

Change your file name
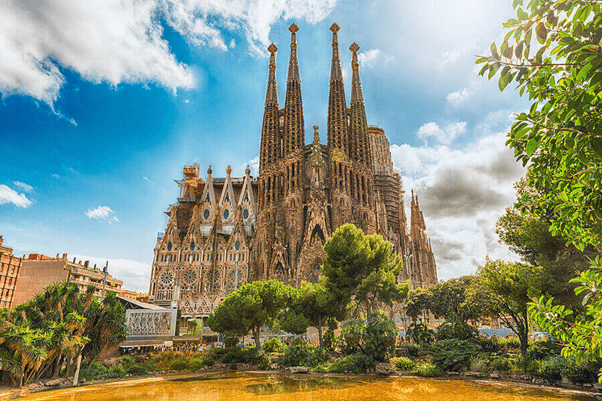
Firstly, when you download your chosen image, update the file’s name. Google won’t understand DSC5483.jpg, but it will comprehend something like “la-sagrada-familia-barcelona.jpg”. Include your primary keyword or phrase at the beginning of the file name, as that will be read first.
If you’re an eCommerce store selling protein shakers, choose something like “large protein shaker” or “yellow protein shaker with grid” if that happens to be what the image involves.
Google uses machine learning to understand what is contained in a picture and uses additional information, such as the domain and the content surrounding the image, to build its knowledge.
For an example of the importance of image file names, try typing ‘girl in a red coat’ into image search. The results will produce a wide variety of things — from Schindler’s List (1994) and Pretty Woman (1990) movie stills to eCommerce product photos and snaps of Kate Middleton.
Rename your images with correct and specific information for a chance of ranking — it’s better for users, machine learning and SEO best practices.
Captions are also important as they provide more context to the search engine crawling the page.

Consider your file size
Once you’ve named your image file, it’s time to resize it.
Large photos can contribute to page load speed issues, so it’s important to avoid that by compressing all images where possible.
This can be done through image compression tools that can be built into a website’s CMS. Some CMSs like WordPress and Shopify may already have a built-in tool to compress images, or you can do it through websites like TinyPNG.

The aim here is to reduce the file size while maintaining quality.
Quick-loading websites make for happy users and search engines due to the improved LCP metrics of the webpage.
Create responsive images
Images need to be made responsive, so they automatically adjust for display on various devices.
You’ll need to make your images responsive, which you may need to manually build into the website’s backend with development help.
Responsive images can also be used to help optimise image loading. Use them with the srcset attribute to ensure smaller images load for small devices and larger images load for large resolutions. This may look like:
<img src=”image-1.png”
Srcset=”image-1.png 350w,
Image-2.png 550w,
Image-3.png 750w”>
This can help with LCP for mobile devices, given they are on a smaller resolution than desktop devices.
If you wish to restrict the image to a certain size or make other changes to images using CSS, you’ll find lots of helpful information here.
Create your alt-text
Alt-text assists the following in understanding the page:
- Visually impaired site users
- Those who have chosen to switch images off in their web browser, for whatever reason
- Search engines
Those with visual impairments may use a screen reader, and alt-text will help the user understand the image and the page.
Beyonce’s production company was sued for discrimination against visually impaired fans in 2019 because the star’s website had an exclusively visual interface with no alt-text behind the images.
The lawsuit was filed when a user felt the site violated the Americans with Disabilities Act (1990). If you have a website targeting the States, you need to ensure you comply with the ADA by providing information for each image you upload.
Google and other search engines cannot ‘see’ images themselves, but they use machine learning to look at the variables in and around each picture — including alt-text.
Alt-text provides search engines with a detailed description of images, allowing search engines to understand the image so it can rank for the correct keywords.
How to write alt-text
- Ensure you describe the image in detail.
- Where appropriate, include the page’s target keyword.
- Do not keyword stuff your alt-text — one keyword is sufficient.
- Don’t waste characters writing “Image of…” or “Photo of…” — users and search engines already know it is an image you are describing.
Examples of good alt text

Alt-text: British Shorthair Blue cat eating food from silver bowl on marble floor.

Alt-text: Bride stood on steps wearing white lace and tulle wedding dress holding a bouquet of flowers.
Add title text
Title text is an attribute that provides additional information about an image on a web page.
This isn’t as important as the alt text and can be skipped if you wish, but it does boost accessibility, so it is recommended.
What does good title text look like?
Your title text will complement your alt-text, perhaps offering more detail. For example, a wildlife image title could be the naming of the wildlife, scientific or not, and what they are doing so it tells the user exactly what it is.
Make use of captions
Google reads image captions. While you don’t need to add one for every image on your site, you can do so to provide additional information for search engines and users if you feel it’s needed.
Users tend to take notice of headers, images, and captions as they scroll down a page and weigh it up.
Image placement
Always use images relevant to the page’s subject and place them near the relevant text on those pages. This is common sense, creates a good UX, and helps Google understand the image more, helping it rank for appropriate queries.
Create an image sitemap
If you are a website that relies heavily on images, you can create specialty sitemaps for images that list all the images used on your website.
Sitemaps offer search engines more information about the images across a website and enable search engines to find images that JavaScript may render.
Sitemaps are relatively easy to make, and Google offers a good example URL in its documentation.
CMSs like WordPress also have a range of plugins that help automate sitemap creation.
If you’re using WordPress, the Google XML Sitemap for Images plugin will do this automatically for you.
On-page image auditing
There is a Chrome extension called Lighthouse, which is great for auditing image alt-text, amongst many other things. The Google Lighthouse tool can be a fantastic extension for SEOs hoping to better optimise images.